
As I cooked lunch this afternoon and took pictures of the yummy food I made, I realized how much I missed doing this. It’s been so so so long since I posted here and damn, I should do it more often because the whole process just feels so good.

The recipe I’ll be sharing today is of Chicken Tikka Biryani. This dish always leaves the house smelling like a nice Mughlai restaurant and has us licking our fingers. This can be made in two ways, both of which will involve infusing flavor through charcoal smoke. One where you grill and smoke the chicken, the other where you smoke the gravy. Both are flavorsome and you can make it depending on whatever is convenient for you. The recipe I will be sharing is by infusing the gravy with smoke. The smoking method is crucial to get the depth of flavor this biryani has to offer.
Don’t get intimidated by what I just said or the list of ingredients below because it is easier than it sounds and can be made in about 2 hours 🙂
INGREDIENTS:
Rice:
2.5 cups Basmati Rice
2 cloves
1 stick Cinnamon
2 Green Cardamom
1 Bay leaf
Salt as required
Marination:
1/2 kg Boneless Chicken
1 cup Yoghurt
1 Tbsp Red chili Powder
1 tsp Coriander Powder
1 tsp Cumin Powder
1 tsp Garam Masala Powder
1 tsp Pepper powder
1/2 tsp Turmeric Powder
1/2 Lime juiced
Salt as per taste
Red food color (optional)
Gravy:
2 Tbsp ghee
2-3 tbsp Oil
2 Big onions finely sliced lengthwise
4 Big Tomatoes finely sliced lengthwise
2 tbsp Ginger Garlic paste
1 Bay Leaf
1 stick Cinnamon
5 Cloves
2 Green Cardamon
2 Brown Cardamon
1 Tsp whole Peppercorn
5 Green Chillies finely chopped
1/2 cup Mint leaves
1/2 cup Coriander leaves
Garnish:
Birista / Onion deep fried in ghee
1/2 lime juiced
1 tbsp Rose water
Yellow Food colouring
Mint leaves
NOTE:
*Chicken with bone can also be used for this recipe.
*Smoking using charcoal is important to get a good depth of flavor.
*Using food coloring is optional.
*Adjust the spice level as per your liking. The spicier, the better is my advice 🙂
*This recipe serves 4-5
METHOD:
Rice:
Infuse water with the mentioned spices and salt and partially cook rice (70%) using the straining method and keep aside. Do not fully cook the rice as it will cook with the masalas later.

Marination:
Marinate chicken for at least one hour with all of the ingredients.

Gravy:
In a nonstick pot, heat ghee, and oil, fry onions till golden brown. Add ginger-garlic paste and sauté well till the raw smell goes away. To this add the sliced tomatoes and cook till mushy. Add whole spices and sauté well. Add marinated chicken with all of the yoghurt mixture and cook well. 
Smoking:
Method 1: Separate the cooked chicken pieces and grill it. Place chicken in a bowl or plate. Heat a piece of charcoal on the stovetop, place the heated charcoal piece into a glass/ steel bowl and keep it in the bowl/ plate of chicken, pour 1 tbsp ghee over the hot charcoal and cover with lid to infuse with smoke. Once done, put the chicken pieces back into the gravy. 
Method 2: Heat a piece of charcoal on the stovetop, place the heated charcoal piece into a glass/ steel bowl and keep the bowl inside the pot with the gravy, pour 1 tbsp ghee over the hot charcoal and cover with lid to infuse with smoke.
I chose to do method 2 today as seen in the pictures above.
After the smoking process, add in green chilies, mint and coriander leaves to the gravy and simmer.
Layering the Biryani:
1st layer: Little rice and little gravy
2nd Layer: Rice
3rd layer: Gravy and little Birista

4th layer: Remaining rice topped with Birista, lime-rose water, mint leaves.
Makes holes all around using a spoon and pour in the ghee that you fried the onions in.
Keep for dum for 15-20 minutes on low flame or till done.
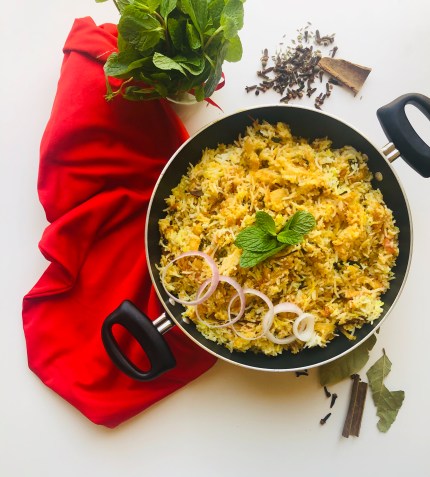

Serve with Raita 🙂
I hope you enjoy this recipe as much as we do!
Also, if you still haven’t followed my Instagram page @every.mom.day then please go follow 🙂
